© STIHL Inc., Virginia Beach, VA 2013
Setup and Service Procedures for the
MS 170, MS 180 Chain Saw
© STIHL Inc., Virginia Beach, VA 2013 US/STR
confidential
Introduction
The MS 170, MS 180 chain saw has a 2-cycle engine
STIHL assigns a 4 digit series number to every product
The MS 170, MS 180 is assigned the 1130 series number
The 1130 series of saw was introduced to the market in
1995 as an 017, and then in 1998 the 018 was added
In 2002 the model designation changed from 017 to MS
170, and 018 to MS 180
1
© STIHL Inc., Virginia Beach, VA 2013 US/STR
confidential
Specifications
Engine Displacement 30.1 cc (1.8 cu.in) 31.8 cc(1.9 cu. in.)
Engine Power 1.3 kW (1.7bhp) 1.5kW (2.0 bhp)
Weight 3.9 kg (8.6 lbs) 4.0 kg (8.8 lbs.)
Fuel Capacity 250 cc (8.5 oz.)
Chain Oil Capacity 145 cc (4.9 oz.)
Recommended OILOMATIC® Chain 3/8” PMM3
Guide Bar Lengths Available 12” to 16”
Engine Idle Speed 2800 RPM
Wide Open Throttle 14,000 RPM (with bar and chain installed)
MS 170 MS 180
© STIHL Inc., Virginia Beach, VA 2013 US/STR
confidential
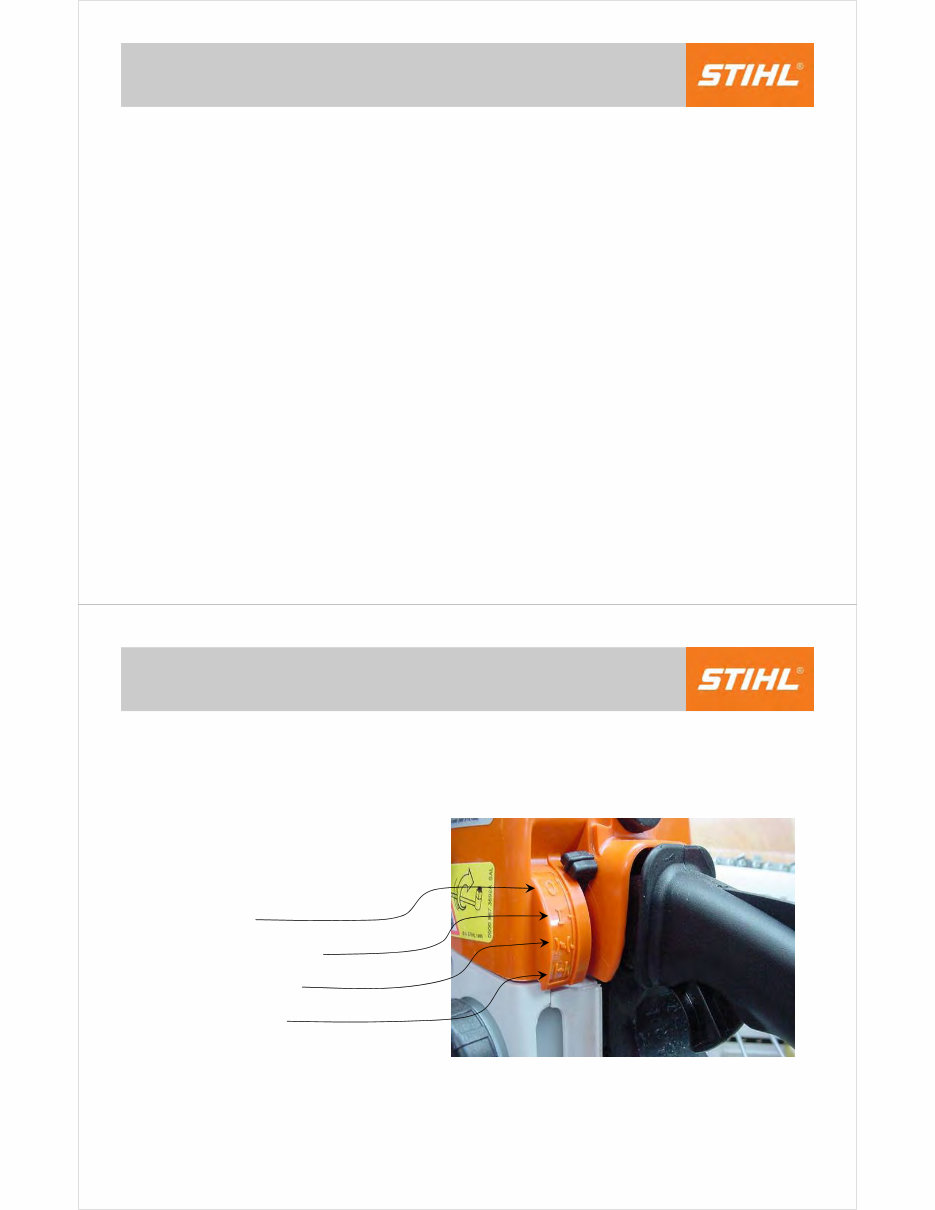
Become Familiar With the Controls
Master Control Lever™
A single lever
operating the choke,
throttle lock and on-off
switch
0 = Off
I = Ignition on
Warm Start
Cold Start
2
© STIHL Inc., Virginia Beach, VA 2013 US/STR
confidential
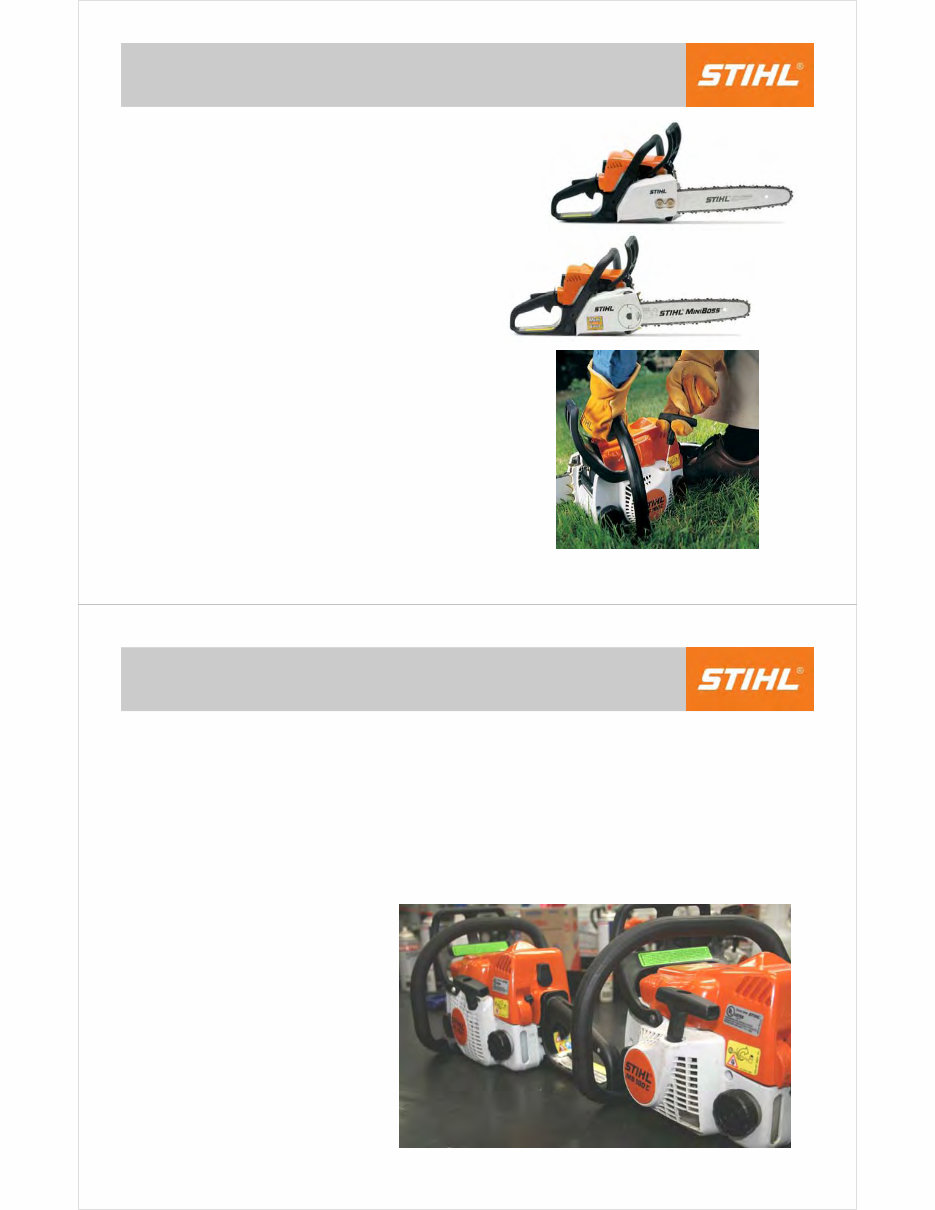
Starting Features
The MS 170 is equipped with a
standard starter mechanism,
and with 2 bar nuts holding the
bar in place
The MS 180 C-B has the
Toolless Quick Chain Adjuster
(QCA) for fast and easy chain
and bar install and adjustment
The MS 180 C-BE also has the
Easy2Start™ starter
mechanism which allows
starting with less effort at a
lower cranking speed
© STIHL Inc., Virginia Beach, VA 2013 US/STR
confidential
Starting Features
The MS 180 C-B has the standard starter mechanism, which
requires a brisk pull on the rope to it’s full extension to start
the engine
The MS 180 C-BE has the Easy2Start™ starter mechanism,
which allows starting by simply pulling out the rope slow and
easy, winding the auxiliary spring which then spins the motor
over to start it
Notice that the MS
180 C-BE has a
deeper recoil
housing and the
handle extends out
slightly farther for
clearance
3
© STIHL Inc., Virginia Beach, VA 2013 US/STR
confidential
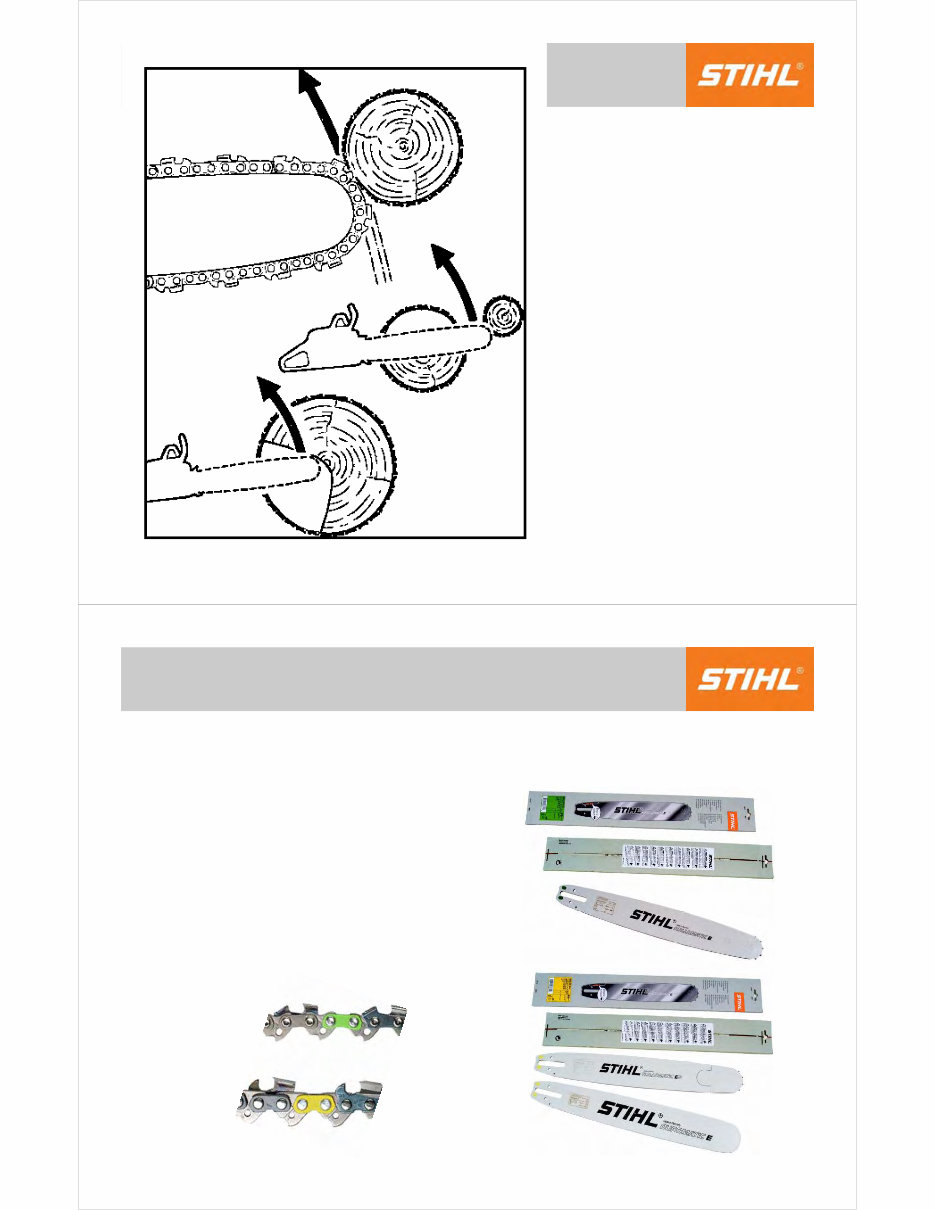
Kickback!!!
Kickback occurs when the
moving saw chain near
the upper quadrant of the
bar nose contacts a solid
object or is pinched
The greater the force of
the kickback reaction, the
more difficult it becomes
for the operator to control
the saw
© STIHL Inc., Virginia Beach, VA 2013 US/STR
confidential
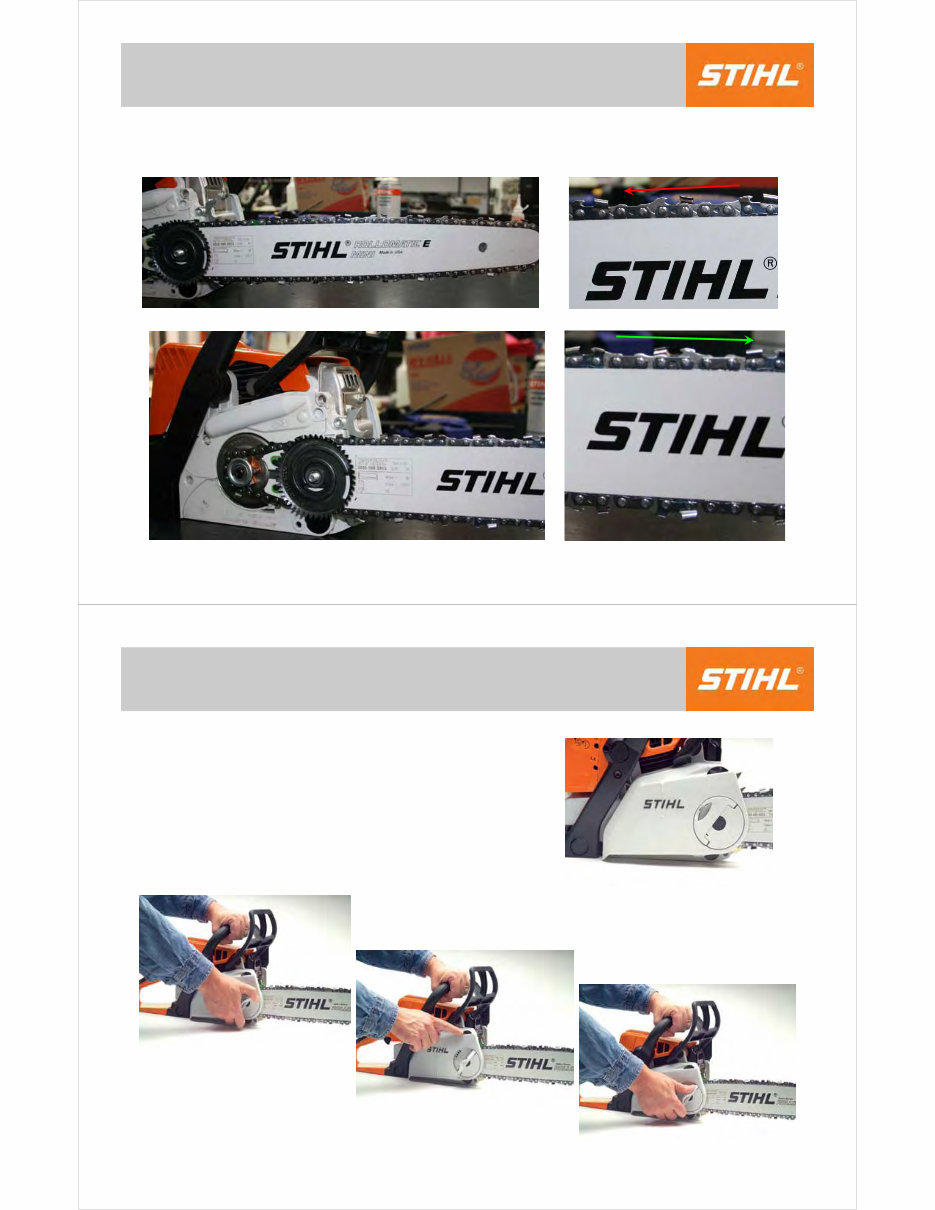
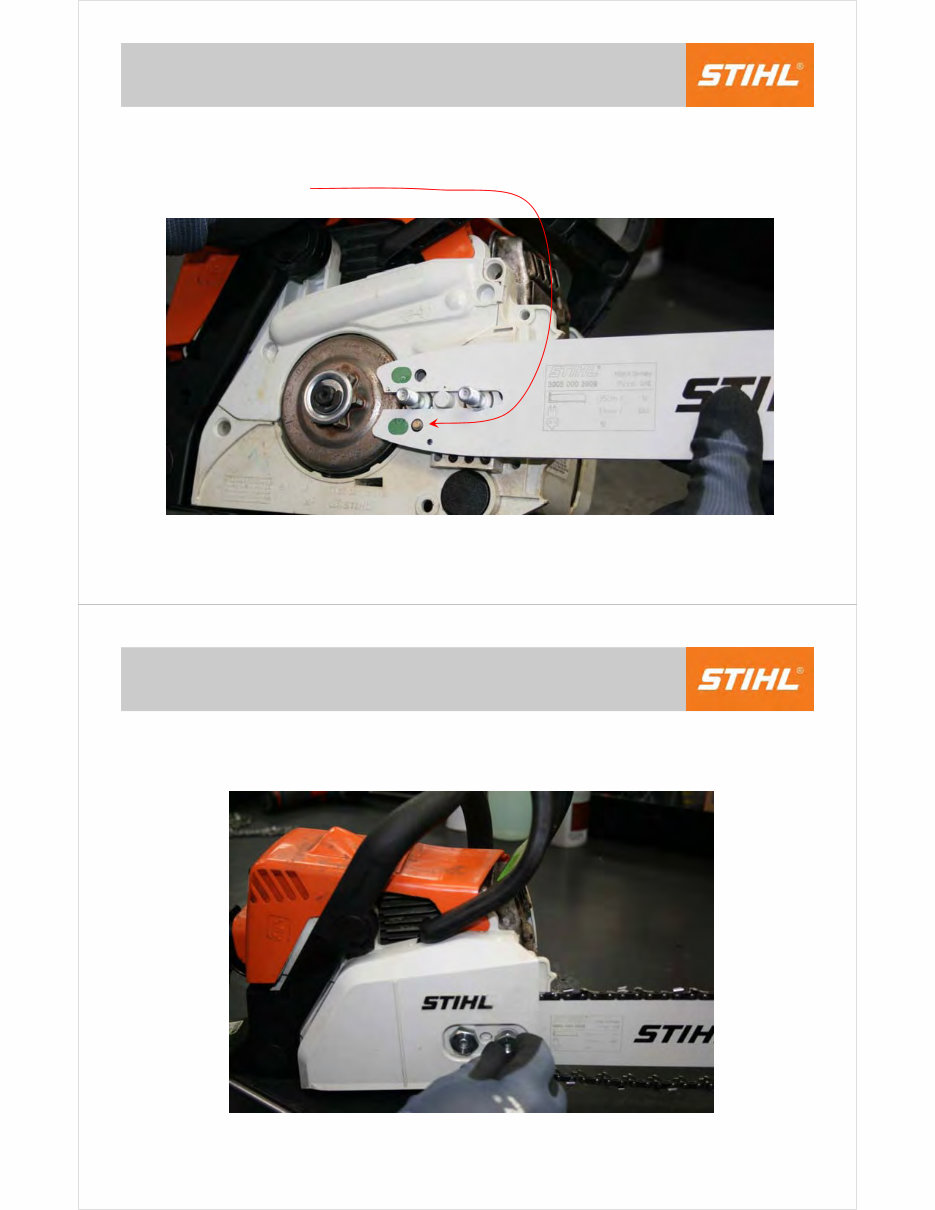
Chain and Bar Color Code Marking
STIHL saw chain will have a green
or yellow tie strap to indicate if the
chain is low-kickback or other than
low-kickback
The bar will have two green or
yellow dots on the powerhead end
of the bar to identify if the bar is a
reduced kickback bar or not
4
© STIHL Inc., Virginia Beach, VA 2013 US/STR
confidential
Install the Bar and Chain
STIHL recommends the use of reduced
kickback bars and low kickback chains on
all STIHL chain saws
Yellow bar and chain combinations are for
trained professionals with extraordinary
cutting needs
Be sure the bar and chain are within the
recommended length for the model of
saw being assembled
Always wear gloves when handling saw
chain to protect your hands from the
sharp cutters
© STIHL Inc., Virginia Beach, VA 2013 US/STR
confidential
Install Bar & Chain: Quick Chain Adjuster
Install the tensioning gear and fasten the screw securely
The bar can be installed with the STIHL logo facing up or
down; periodically the bar should be flipped to spread the
wear over both edges of the bar
5
© STIHL Inc., Virginia Beach, VA 2013 US/STR
confidential
Install Bar & Chain
Make sure the cutters on top of the bar are facing away from
the powerhead!
WRONG
CORRECT
WRONG
© STIHL Inc., Virginia Beach, VA 2013 US/STR
confidential
Quick Chain Adjuster (QCA)
The QCA allows the user to adjust the
chain tension without tools
Loosen the wing nut
Rotate the
adjusting wheel
Tighten the wing nut
6
© STIHL Inc., Virginia Beach, VA 2013 US/STR
confidential
Install Bar & Chain
If the saw does not have a QCA simply remove the 2 bar nuts,
install the bar and chain, making sure the adjusting pin is in the
hole in the bar
© STIHL Inc., Virginia Beach, VA 2013 US/STR
confidential
Install Bar & Chain
Install the cover and the 2 nuts leaving them just snug against
the cover
7
© STIHL Inc., Virginia Beach, VA 2013 US/STR
confidential
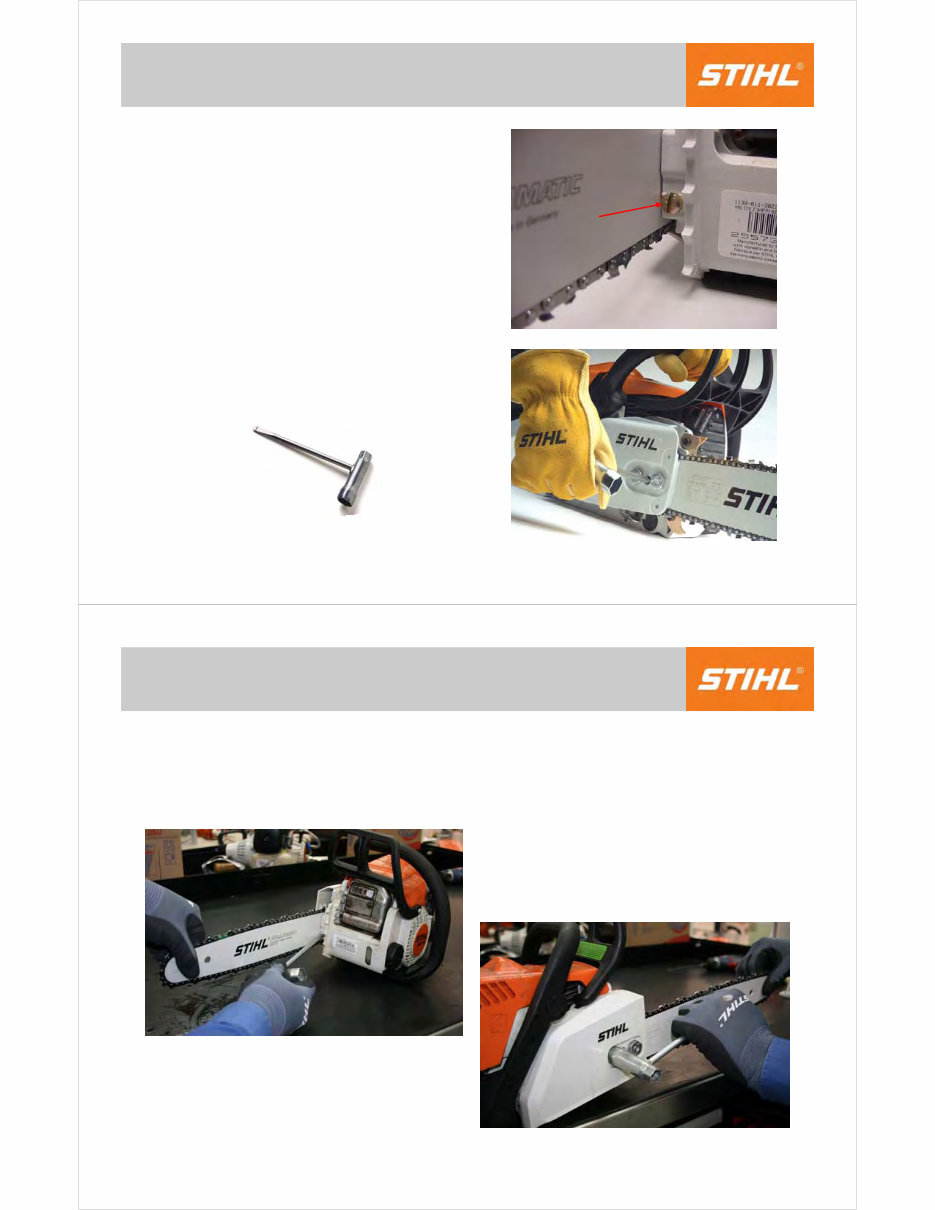
Chain Adjustment
The 1130 saws have a front
chain tensioner
Most STIHL chain saws have a
side chain tensioner that is more
convenient to use
Saws come with a combination
wrench, commonly referred to as
a “Scrench”, to make bar and
chain service easy to do
© STIHL Inc., Virginia Beach, VA 2013 US/STR
confidential
Install Bar & Chain
Adjust the chain tension with the “Scrench” by holding up on
the nose of the bar, tightening the chain tension screw, then
tightening the nuts
8
© STIHL Inc., Virginia Beach, VA 2013 US/STR
confidential
Correct Chain Tension
With the chain brake
disengaged, pull the
chain through from the
top side and it should
rotate freely without any
slack appearing
If the chain goes from
tight to loose the
sprocket and chain may
not be of the same pitch,
or the sprocket and chain
may have excessive
wear and no longer have
the same pitch
© STIHL Inc., Virginia Beach, VA 2013 US/STR
confidential
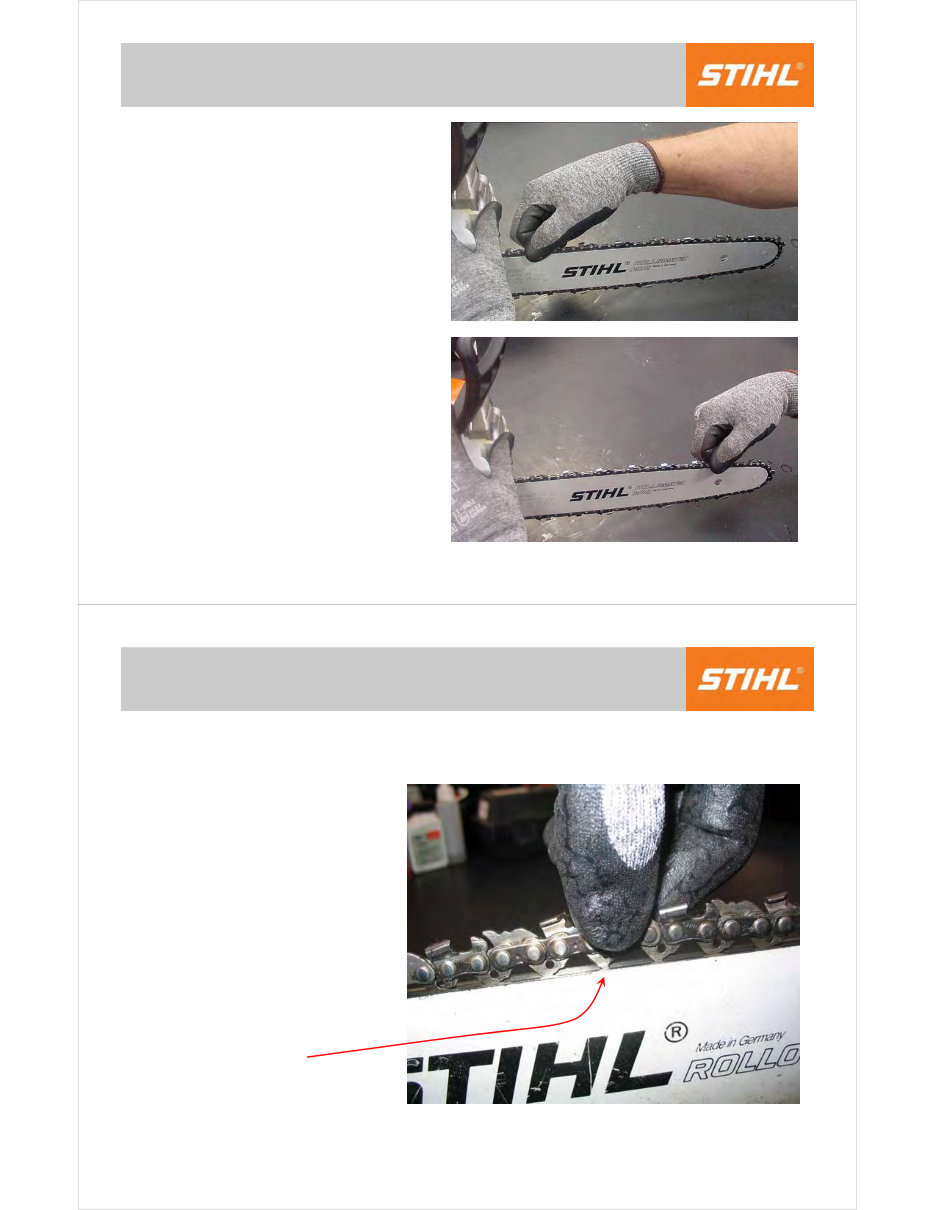
Correct Chain Tension
Regardless of bar
length, check for
correct chain tension
by pulling up on the
chain at the center of
the bar
The tension is correct
when the bottom of the
drive link will just clear
the bar groove
9
© STIHL Inc., Virginia Beach, VA 2013 US/STR
confidential
Cutterless Chain for Service
For any chain saw, to properly tune the carb or verify running
RPM at idle and wide open throttle a bar and chain should be
installed
Cutterless chains are available to provide a safe way for the
service technician to do this without fear of the chain coming
into contact with anything
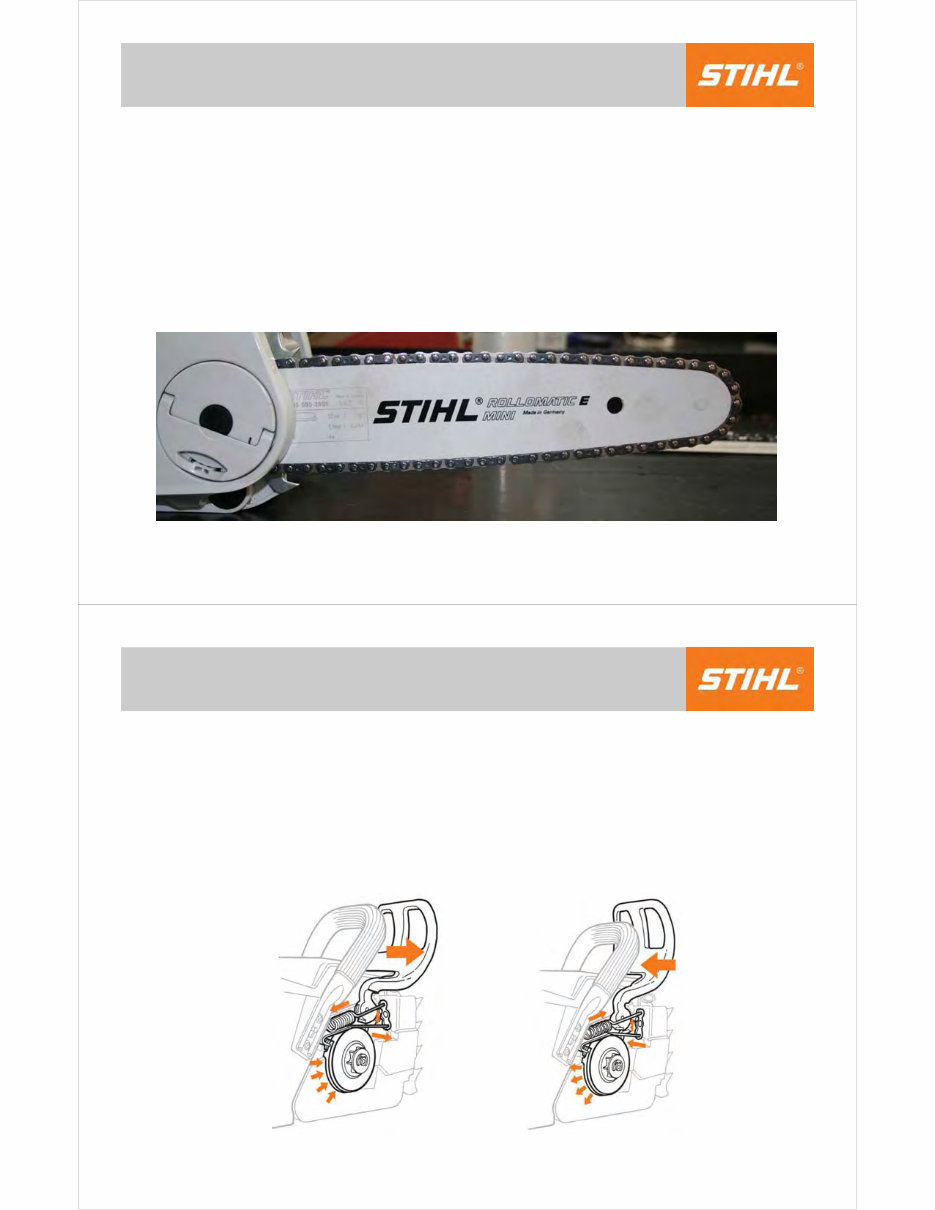
© STIHL Inc., Virginia Beach, VA 2013 US/STR
confidential
All Current Models of STIHL Chain Saws are Equipped with
the STIHL Quickstop® Chain Braking System
The chain is stopped and locked when the hand guard is
pushed toward the guide bar nose by the left hand – or when
the brake is activated by enough inertia in certain kickback
situations
Brake
Band
Engaged
Brake
Band
Disengaged
Chain Brake
10
You're Reading a Preview
What's Included?
Lifetime Access
Access Contents & Bookmarks
Print one or all pages of your manual